Higher gas prices, increasing repair costs and required emissions testing are important reasons for today's vehicle owners to test and tune their cars to keep them running smoothly. Computerized cars may seem scary to first-time D-I-Y'ers, but with a little basic knowledge you can learn that troubleshooting and tune-up is easy and fun! This article is designed to teach you about the new engine technology and the new test equipment for troubleshooting computer-controlled cars. Armed with this knowledge, you can help yourself "unlock the hood" of newer cars and save money on vehicle repair costs. This article is divided into 6 sections:
- Description of computer-controlled engine systems
- DIY Tips
- Trouble Codes
- Sensor Tests
- Engine Tests
- A simple reference chart listing common engine problem symptoms and the tools used to diagnose and repair.
A) Unlocking the Hood: An Engine Troubleshooting Guide
Computerized Engines Offer New Challenges
Over the past 15-20 years mechanical engine controls have been replaced by vacuum, electronic and most importantly, computer controls. It is normal to be uncertain about working on a computer-controlled engine at first, because it is new and different. But with just a little time, education and experience, "high tech" becomes easy and safe. Remember how quickly we learned the new technology of VCRs, microwave ovens and personal computers?
The Computer
- Controls the fuel injectors (delivers gas to the cylinders replaces the carburetor)
- Controls engine idle speed
- Controls spark advance timing (replaces function of vacuum and centrifugal advance in distributor)
- Controls emission control devices, such as EGR valves
Computer-controlled engines and older engines have one thing in common: they both experience breakdowns that can be tested and repaired with simple troubleshooting steps.
In the early '80's, car manufacturers added computer controls to vehicle engines in order to meet Federal Government economy and emission standards. A computer-controlled engine is basically the same as earlier types. It is still an internal combustion engine with pistons, plugs, valves and cams along with associated ignition, charging, starting and exhaust systems. Only the engine control systems have changed, and they have become computer-controlled. If the vehicle problems do not relate to the computer-controlled areas previously mentioned, you troubleshoot and fix them the same way you always have!
Problems in the computer-controlled system are usually due to bad sensors (which tell the computer what is happening to the engine), bad actuators (the computer-controlled devices that affect engine operation, such as fuel injector) or bad wiring/poor connectors. The computer itself rarely goes bad. Actron's owner manuals are a good reference source, as they are fully illustrated and easy to understand. They clearly show how to test and tune today's cars using Actron test equipment. You can refer to these manuals for specific applications and test and replace many of these components yourself with the proper Actron equipment -- saving yourself time and money!
B) Unlocking the Hood: An Engine Troubleshooting Guide
DIY Tips
If your car was manufactured after 1981, chances are good it has an on-board computer and requires one or more of the Actron tools for computer-controlled vehicles.
Some of the benefits of do-it-yourself maintenance:
- Save Money
Save the high cost of labor by doing it yourself.
- Save Time
Do the work on your time and at your location.
- Be a Smart Consumer
Protect yourself by diagnosing the problem before taking the vehicle into the shop. Be equipped with knowledge about your car.
- Better Gas Mileage
A properly running vehicle uses less gasoline by running more efficiently.
- Pass Emission Tests
Poorly tuned vehicles may fail state emission testing, requiring costly repairs.
- Sense of Pride and Enjoyment
Knowing you have the skill to "Do-It-Yourself"
C) Unlocking the Hood: An Engine Troubleshooting Guide
Engine Computer Trouble Codes
The engine computer can do special tests to diagnose vehicle problems prior to making DIY repairs or taking the car into a professional shop. Test results are reported as numerical "trouble codes". Use a Code Scanner or Scan Tool to obtain trouble codes quickly and easily. The owner’s manual for the manufacturer specific code scanners (GM, Ford and imports) includes detailed test instructions and over 300 trouble code definitions. The Autoscanners include a CD-ROM with over 5,000 code definitions.
Recommended Tools:
- SUPER AutoScanner Kit CP9150
- SUPER AutoScanner CP9145
- SPANISH OBD II AutoScanner CP9138S
- OBD II AutoScanner CP9135
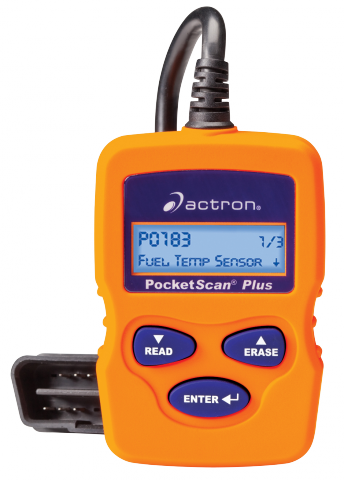
- PocketScan Code Reader CP9125
- Honda/Nissan/Toyota Code Scanner CP9025
- Ford Code Scanner CP9015
- GM Code Scanner CP9001
D) Unlocking the Hood: An Engine Troubleshooting Guide
General Sensor Tests
Computer-controlled engines require good, working sensors. Severe performance problems can result when sensors fail. Check sensors for proper operation.
Recommended Tool:
- AutoTroubleShooter CP7677
- Ignition Module and Sensor Tester CP9087
MAP, MAF and VAF Sensor Tests:
Critical MAP (Manifold Absolute Pressure), MAF (Mass AirFlow) and VAF (Vane AirFlow) sensors must be kept in reliable working condition.
Recommended Tool:
- AutoTroubleShooter CP7677
- Ignition Module and Sensor Tester CP9087
Ignition Module Test
Faulty ignition modules can cause no-start problems. Check modules for proper operation.
Recommended Tool:
AutoTroubleShooter CP7677
Ignition Module and Sensor Tester CP9087
E) Unlocking the Hood: An Engine Troubleshooting Guide
Basic Tests Anyone Can Do on a Computer-Controlled Car
Before we describe the tests for computer sensors, it is vital to remember that many important checks can still be made the old familiar way. The basic engine has not changed and the computer does not control everything!
Compression Test
Use a compression gauge to test for proper compression in each cylinder. Improper compression can cause rough idling or running, backfiring and poor fuel economy. Can also be used to test valve problems, piston rings and timing chain.
Recommended Tools:
- Professional Compression Tester CP7828
- Compression Tester Kit CP7827
- Stem Compression Tester CP7821
Engine Vacuum
Use a vacuum gauge to test for proper intake manifold vacuum at idle. Improper vacuum can mean problems with ignition timing, piston rings, valves, valve timing, valve springs, valve guides, manifold leaks and some carburetor adjustments. Even small vacuum leaks can cause hard starting, stalls, and poor engine performance.
Recommended Tools:
- Hand Pump / Brake Bleed Kit CP7835
- Hand Vacuum Pump CP7830
- Vacuum/Pressure Tester Kit CP7803
Check/Adjust Basic Engine Timing
Correct timing is essential to maintain top performance. Timing refers to when the engine tells each spark plug to fire. A chart under the hood of most cars shows what the timing should be at various RPM levels. Use a timing light to set the timing on any engine (computer-controlled or not) that has a conventional distributor ignition system. Timing cannot be manually adjusted on cars with distributorless ignition systems, but it is important to check computer timing to see if it might be the cause of engine problems. Use an advance timing light such as the Timing Advance Analyzer CP7519 to check whether the computer is "advancing the spark" according to spec as engine speed increases.
Recommended Timing Lights:
- DC Power Timing Light CP7520
- Timing Advance Analyzer CP7519
- Chrome Inductive Timing Light CP7515
- Inductive Timing Light CP7504
Vacuum Leak Test
Leaky vacuum lines can cause problems for any engine. A vacuum pump can be used to check vacuum lines as well as vacuum-operated solenoids and switches.
Recommended Tool:
- Hand Pump / Brake Bleed Kit CP7835
- Hand Vacuum Pump CP7830
- Vacuum/Pressure Tester Kit CP7803
Remote Starter Switch
Start, crank or "bump" engine while under hood. Useful for compression tests, checking camshaft or crankshaft sensors and adjustment work on valves, distributor or camshaft.
Recommended Tool:
- Remote Starter Switch CP7853
Battery Voltage Test
Low batteries can cause intermittent problems well before the battery completely dies. Battery voltage should be at least 12.4 volts. Use a voltmeter or battery load tester to check.
Recommended Tools:
- AutoTrouble Shooter CP7677
- Digital Multimeter CP7676
- Digital Multitester CP7674
- Digital Multitester CP7672
- AutoAnalyzer CP7665
- Battery Load Tester CP7612
- Battery/Alternator Tester CP7611
- Dwell/Tach/Volt Analyzer CP7605
Cranking System Voltage Test
The cranking system requires at least 8-1/2 to 9 volts to start the engine. Use a voltmeter to test cranking system voltage.
Recommended Tools:
- AutoTrouble Shooter CP7677
- Digital Multimeter CP7676
- Digital Multitester CP7674
- Digital Multitester CP7672
- AutoAnalyzer CP7665
- Dwell/Tach/Volt Analyzer CP7605
Lighting System Voltage Test
Use a voltmeter to test lighting systems.
Recommended Tools:
- AutoTrouble Shooter CP7677
- Digital Multimeter CP7676
- Digital Multitester CP7674
- Digital Multitester CP7672
- AutoAnalyzer CP7665
- Dwell/Tach/Volt Analyzer CP7605
F) Unlocking the Hood: An Engine Troubleshooting Guide
| Troubleshooting Reference Chart | ||
| Engine Component or Function | Recommended Actron Product | Test Selection/Range |
| Air Temperature Sensor/Switch | DC Power Timing Light CP7520 Timing Advance Analyzer CP7519 Chrome Inductive Timing Light CP7515 Inductive Timing Light CP7504 | Crankshaft degrees |
| Battery and Charging Voltage | Battery/Alternator Tester CP7611 | LED Voltage indicators |
| Battery Condition | Battery Load Tester CP7612 | Load Test |
| Battery Volts | AutoTrouble Shooter CP7677 Digital Multimeter CP7676 Digital Multitester CP7674 Digital Multitester CP7672 AutoAnalyzer CP7665 Battery Load Tester CP7612 Battery/Alternator Tester CP7611 Dwell/Tach/Volt Analyzer CP7605 | Volts: Digital - 20V Analog - 16V |
| Cam Position Sensor | Ignition Module and Sensor Tester CP9087 | "Test" light blinks or On/Off |
| Charging System Volts | AutoTrouble Shooter CP7677 Digital Multimeter CP7676 Digital Multitester CP7674 Digital Multitester CP7672 AutoAnalyzer CP7665 Battery Load Tester CP7612 Battery/Alternator Tester CP7611 Dwell/Tach/Volt Analyzer CP7605 | Volts: Digital - 20V Analog - 16V |
| Cranking System Volts | AutoTrouble Shooter CP7677 Digital Multimeter CP7676 Digital Multitester CP7674 Digital Multitester CP7672 AutoAnalyzer CP7665 Dwell/Tach/Volt Analyzer CP7605 | Volts: Digital - 20V Analog - 16V |
| Computer Advance Timing | Advance Inductive Timing Light CP7519 | Verify degrees advance with advance knob |
| Coolant Temperature Sensor | Ignition Module and Sensor Tester CP9087 | "Test" light changes brightness |
| Crankshaft Position Sensor | Ignition Module and Sensor Tester CP9087 | "Test" light blinks or On/Off |
| Cylinder Compression | Professional Compression Tester CP7828 Compression Tester CP7827 Stem Compression Tester CP7821 | PSI or kPa scale |
| DC Idle Speed Control Motor | Ignition Module and Sensor Tester CP9087 | Manual contains test instructions |
| EGR Valve Position Sensor | Ignition Module and Sensor Tester CP9087 | "Test" light changes brightness |
| Engine Computer Trouble Codes | Super AutoScanner Kit CP9150 Super AutoScanner CP9145 OBD II AutoScanner CP9135 SPANISH OBD II AutoScanner CP9138S PocketScan Code Reader CP9125 Import Code Scanner CP9025 Ford Code Scanner CP9015 GM Code Scanner CP9001 | Manual contains test instructions |
| Fuel Pressure | Professional Fuel Pressure Tester Kit CP7838 Multiport Fuel Injection CP7818 GM TBI CP7817 Vacuum & Pressure Tester Kit CP7803 (Mechanical Fuel Pump) | 0-100 psi 0-100 psi 0-60 psi 0-10 psi |
| GM C-3 Mixture Control Solenoid | Digital AutoTroubleShooter CP7677 Dwell/Tach/Volts Analyzer CP7605 | Dwell / 6 cylinder |
| Ignition Module | Ignition Module and Sensor Tester CP9087 | Manual contains test instructions |
| Knock Sensor | Ignition Module and Sensor Tester CP9087 | "Test" light blinks |
| Mass Airflow (MAF) Sensor | Ignition Module and Sensor Tester CP9087 | "Test" light changes brightness |
| Manifold Absolute Pressure (MAP) Sensor | Ignition Module and Sensor Tester CP9087 | "Test" light changes brightness |
| Monitoring Engine Speed (Tach or RPM) | Super AutoScanner Kit CP9150 Super AutoScanner CP9145 Digital AutoTroubleShooter CP7677 Digital Multimeter CP7676 Dwell/Tach/Volts Analyzer CP7605 | Appropriate menu selection Appropriate menu selection Tach: Range to match speed measured |
| Monitoring Engine Vacuum | Vacuum Pump/Brake Bleed Kit CP7835 Hand Vacuum Pump CP7830 Vacuum & Pressure Tester Kit CP7803 | Inches or kPa scale |
| One-man brake bleed operation | Vacuum Pump/Brake Bleed Kit CP7835 Brake Bleed Kit CP7840 Hand Vacuum Pump CP7830 | Instructions included with kit |
| Oxygen Sensor | Ignition Module and Sensor Tester CP9087 | "Test" light switches On/Off |
| Ported Vacuum Switch | Digital AutoTrouble Shooter CP7677 Digital Multimeter CP7676 Digital Multitester CP7674 Digital Multitester CP7672 AutoAnalyzer CP7665 | Ohms/200 |
| Start or "bump" engine while under hood | Remote Starter Switch CP7853 | Push button |
| Throttle Position Sensor | Ignition Module and Sensor Tester CP9087 | "Test" light changes brightness |
| Vacuum leaks | Vacuum Pump/Brake Bleed Kit CP7835 Hand Vacuum Pump CP7830 Vacuum & Pressure Tester Kit CP7803 | Read vacuum on gauge |
| Vacuum-operated solenoids, etc. | Vacuum Pump/Brake Bleed Kit CP7835 Hand Vacuum Pump CP7830 Vacuum & Pressure Tester Kit CP7803 | Component operates when vacuum applied |
| Vane Air Flow (VAF) Sensor | Ignition Module and Sensor Tester CP9087 | "Test" light changes brightness |
| For acceptable test readings, consult your vehicle's service manual. Service manuals are available from the vehicle manufacturer or your local public library. | ||